以下是自己在研究NEXT主题的时候想要完善自己的主题搜寻的整理的方法
添加阅读时间字数提示
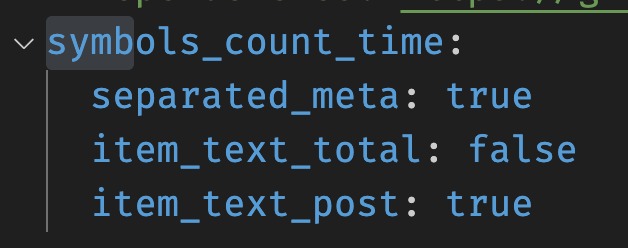
效果如图:

- git 黑窗口中输入以下命令:
npm install hexo-symbols-count-time- 在blog的根目录的 _config中 复制下面这段话到末尾
symbols_count_time:
  symbols: true
  time: true
  total_symbols: true
  total_time: true
  exclude_codeblock: false
  awl: 2
  wpm: 275
suffix: "mins."- 在 主题的 config文件中找到,并且 输入 true即可,效果可以自行查看。
添加网站运行时间
F:\hexo\blog\themes\next\layout\_partials\footer.swig在文件的末尾复制粘贴以下内容:
<!-- 网站运行时间的设置 -->
<span id="timeDate">载入天数...</span>
<span id="times">载入时分秒...</span>
<script>
    var now = new Date();
    function createtime() {
        var grt= new Date("03/01/2023 10:00:00"); //此处修改你的建站时间或者网站上线时间
        now.setTime(now.getTime()+250);
        days = (now - grt ) / 1000 / 60 / 60 / 24; dnum = Math.floor(days);
        hours = (now - grt ) / 1000 / 60 / 60 - (24 * dnum); hnum = Math.floor(hours);
        if(String(hnum).length ==1 ){hnum = "0" + hnum;} minutes = (now - grt ) / 1000 /60 - (24 * 60 * dnum) - (60 * hnum);
        mnum = Math.floor(minutes); if(String(mnum).length ==1 ){mnum = "0" + mnum;}
        seconds = (now - grt ) / 1000 - (24 * 60 * 60 * dnum) - (60 * 60 * hnum) - (60 * mnum);
        snum = Math.round(seconds); if(String(snum).length ==1 ){snum = "0" + snum;}
        document.getElementById("timeDate").innerHTML = "本站已安全运行 "+dnum+" 天 ";
        document.getElementById("times").innerHTML = hnum + " 小时 " + mnum + " 分 " + snum + " 秒.";
    }
setInterval("createtime()",250);
</script>
即可在网页的页脚显示网站已经运行了多长时间
效果如图下所示

右上角Github图标
直接在主题配置文件中搜索:github_banner
# `Follow me on GitHub` banner in the top-right corner.
github_banner:
  enable: true
  permalink: https://github.com/zhzvite
  title: Follow me on GitHub
然后修改内容即可。
如下图所示:

添加搜索功能
打开博客的搜索文章的 功能
下载搜索插件:
git bash黑窗口中输入:
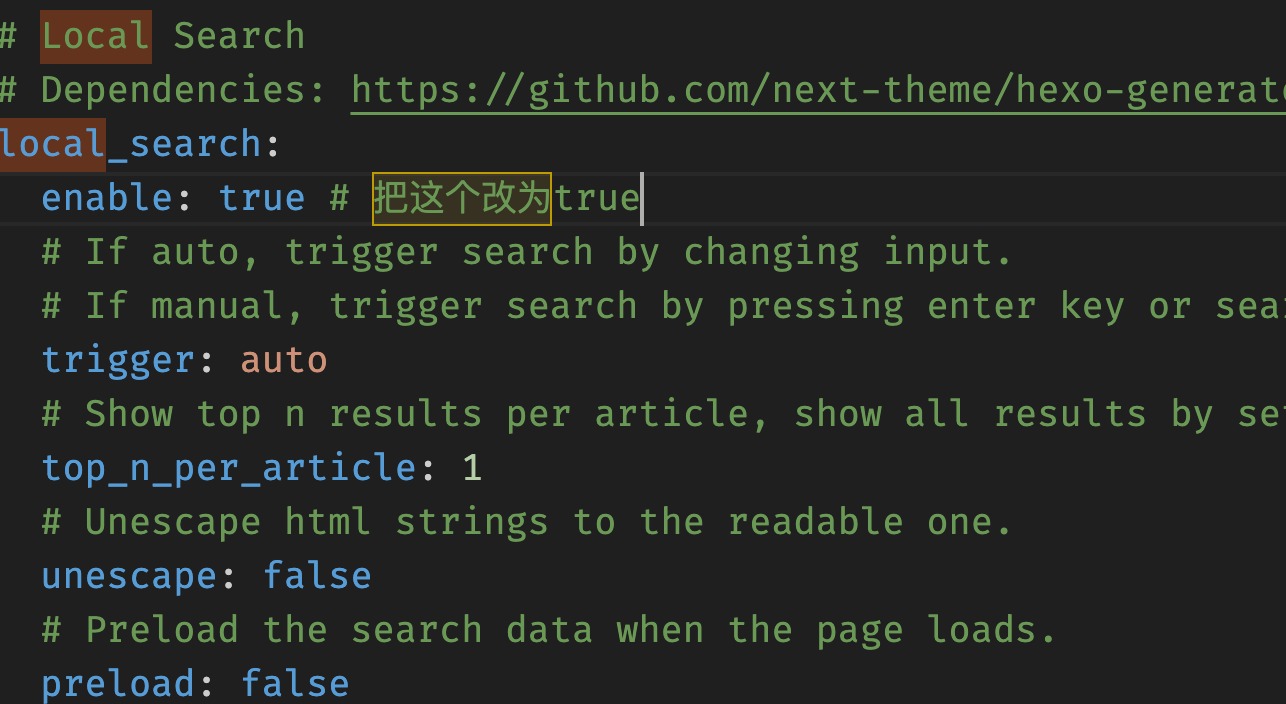
npm install hexo-generator-searchdb- 主题 的 _config 配置文件中找到 local_search,下面的 enable输入true即可。
- 在根目录的 _config.yml 文件中 的末尾添加下面的内容:(选项的内容可以适当修改)
# hexo-generator-searchdb
search:
  path: search.xml
  field: post
  format: html
  limit: 10
hexo cl &&hexo g &&hexo s
touch CNAME即可看见更新 如以下界面 <img src="https://cdn.jsdelivr.net/gh/zhzvite/picgoroom@img/img/202402071318618.jpg" alt="blob"> ## Github域名挂载 > github pages域名挂载,以阿里云域名为例子,其他域名类似 ### 第零步 去[阿里云域名网站](https://wanwang.aliyun.com/newdomain/1yuan?domainCartTradeParams=dr_27906258_000&_v_=6ff4a055f2f22f9d118832696bb06df3&keyword=)买一个自己中意的域名,新人能享受1元一年服务,快剁手吧! ### 第一步 首先是用`ping`命令找到存放你的github pages的主机的IP地址,在终端里面用命令`ping xxx.github.io`便可完成,下图中红框内的就是我们要找的IP地址: 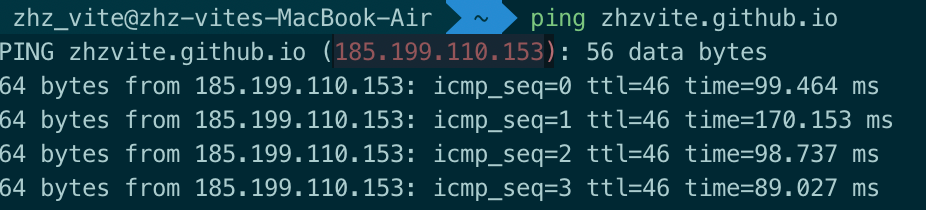 记住这个ip地址 ### 第二步 在购买域名的提供商为域名添加解析。我是在阿里云买的域名,因此我以阿里云的为例。在域名控制台选择想要绑定的域名,并点击解析:  域名控制台 然后添加如下两条记录:  添加记录 ### 第三步 打开命令行/终端,切换到blog文件夹内的source目录 输入以下命令
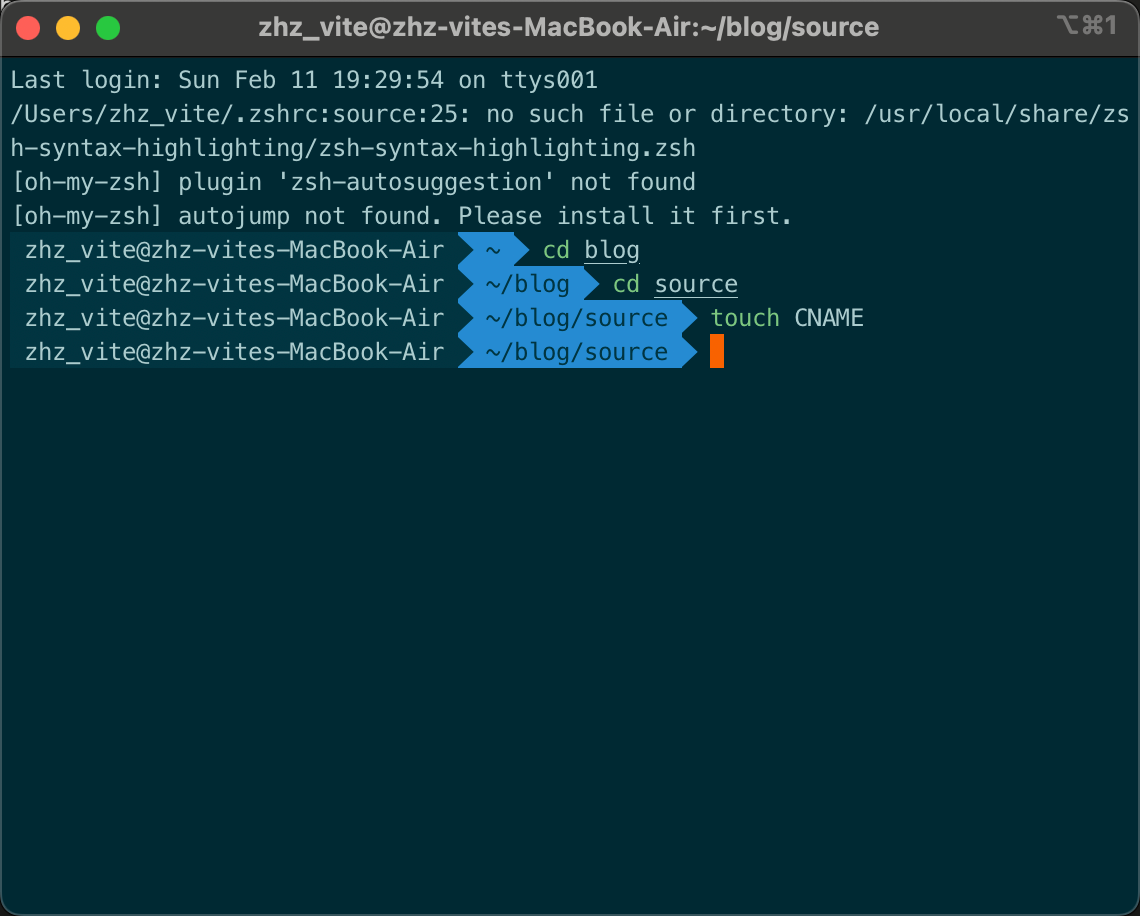
然后会生成一个叫做CNAME的文件,打开编辑,里面输入你买的域名,不用写`http`/`https`和`www`
<img src="https://cdn.jsdelivr.net/gh/zhzvite/picgoroom@img/img/202402111941981.png" alt="image-20240211193948472" style="zoom:50%;" />
然后可以尝试`hexo g+hexo d`部署你的博客,然后等一下github更新就好了
之后若是想检查域名是否挂载成功可以做如下操作:
在Github中,找到托管博客的`xxx.github.io`项目:
进入到设置页面,并滑动到下方,找到**Github Pages**这一栏,在**Custom Domain看域名**是否是自己填的那个:
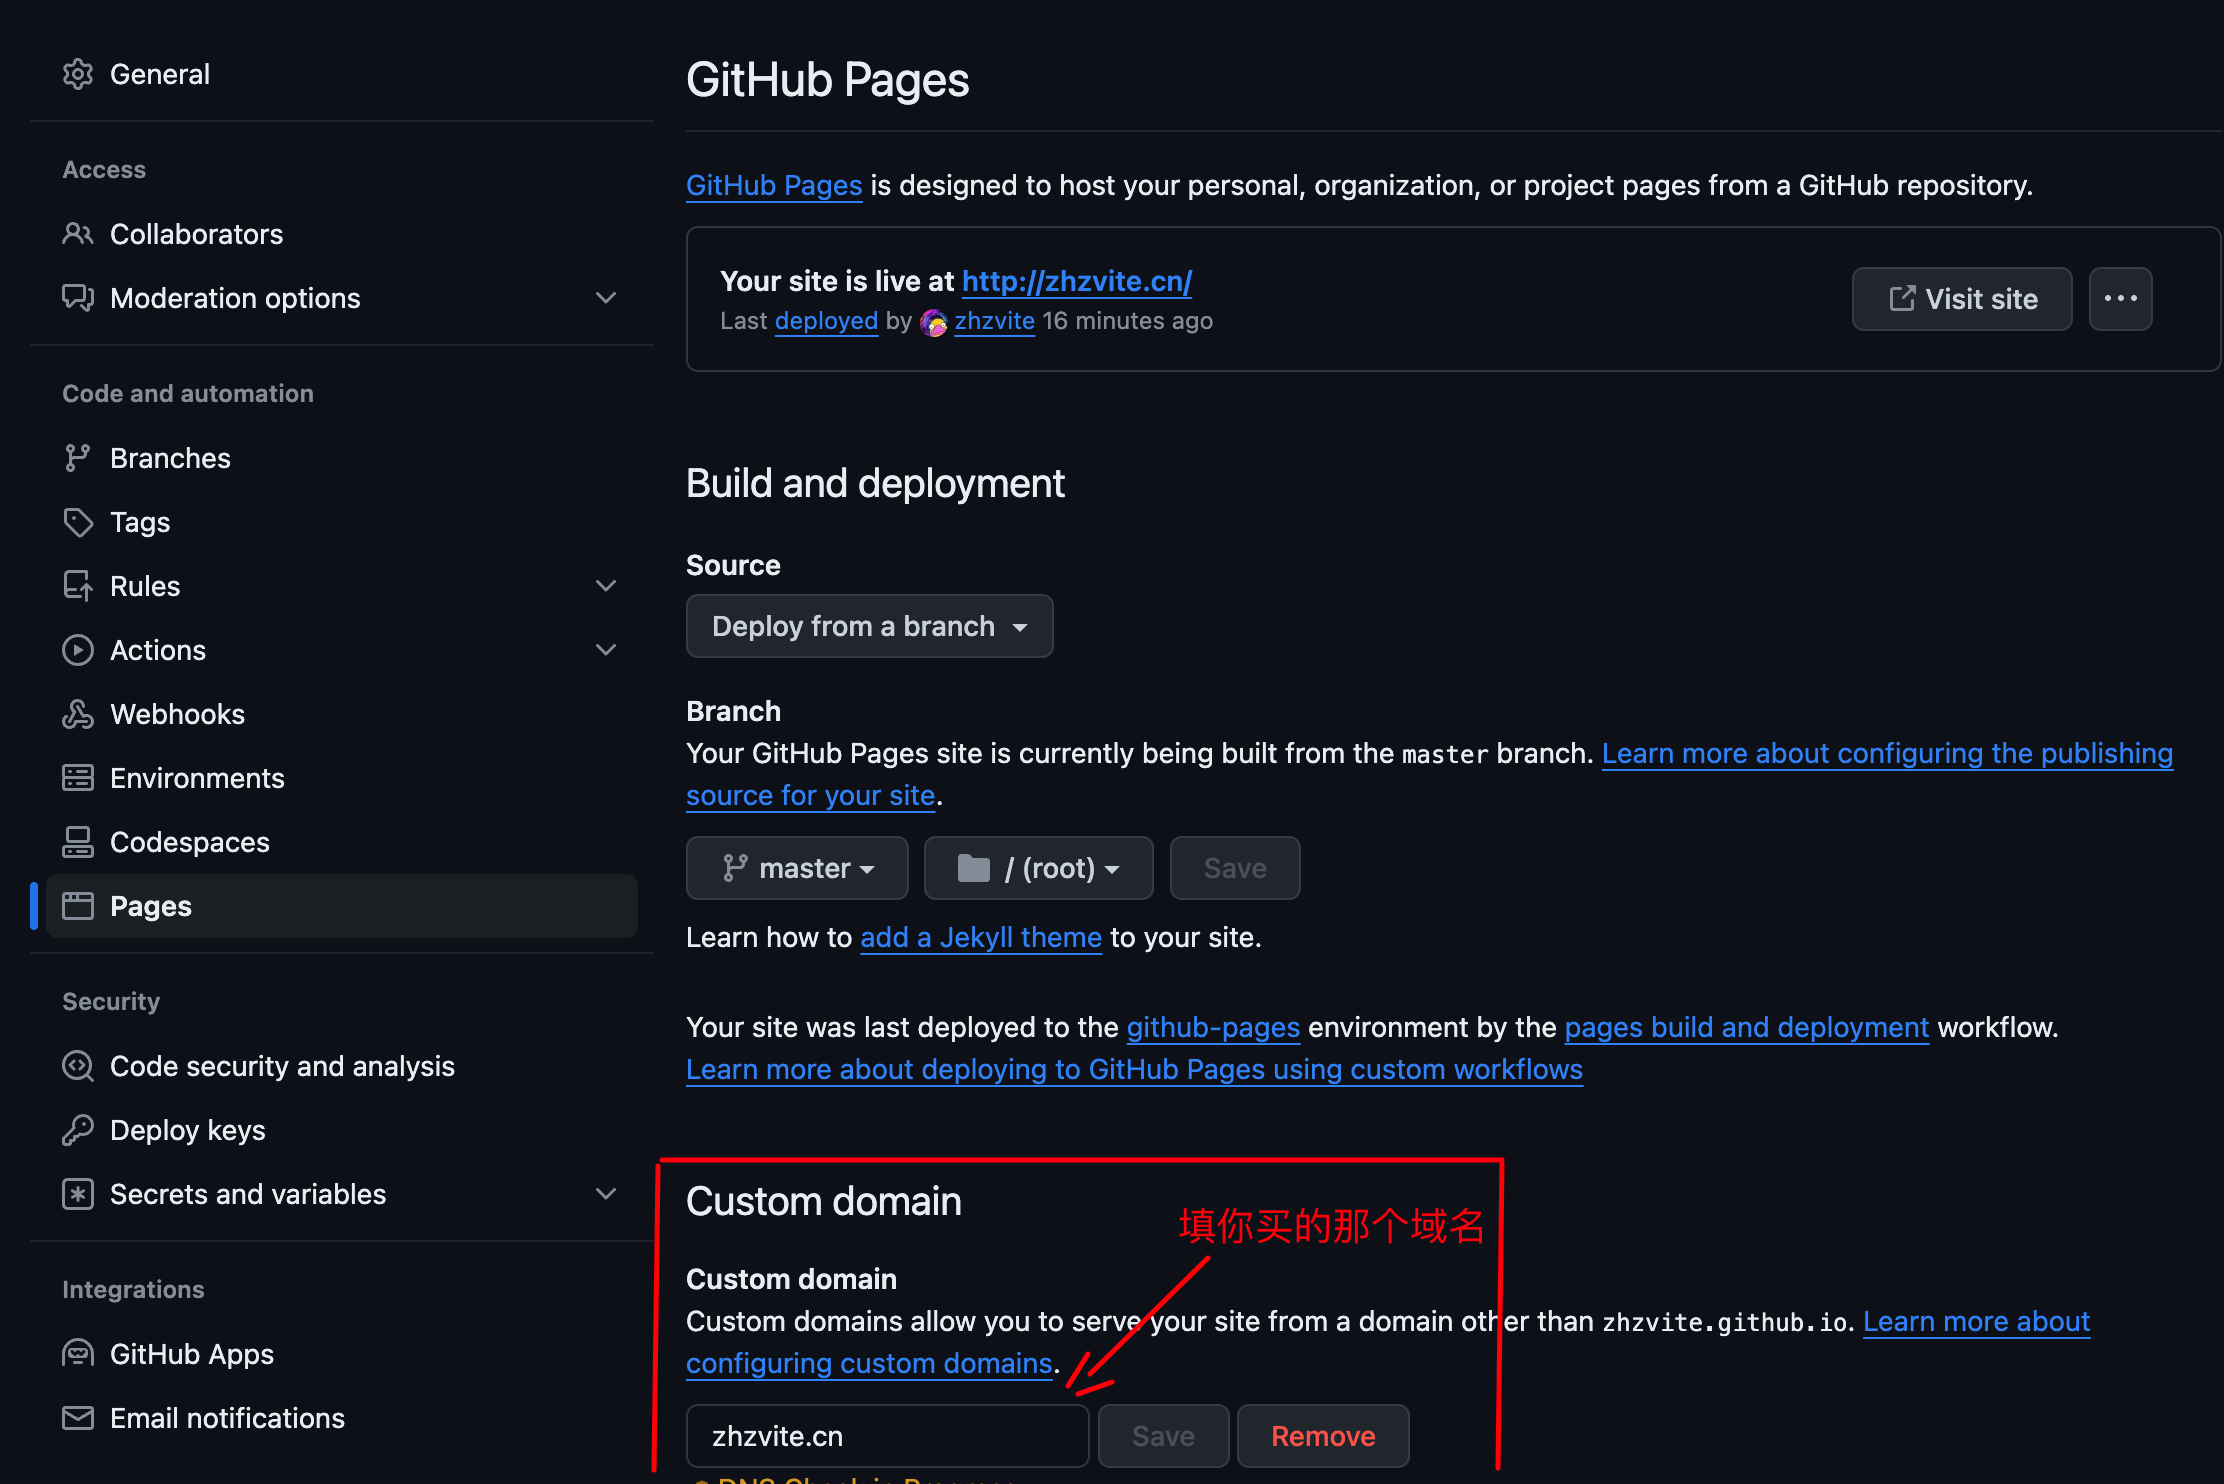
到这儿就已经完成了,等待10分钟(左右)就可以使用自定义的域名访问github pages所提供的页面了。
## 博客背景图片美化
### 添加背景图片
在blog的根目录下的source文件夹下新建_data文件夹,并且新建style.styl文件
路径如下所示:
F:\hexo\blog\source_data\styles.styl
之后在Next主题配置文件中中找到:`custom_file_path` 取消`style`的注释,意味着启用这个文件。

打开复制粘贴如下内容:

```css
body {
    background:url(/images/background.png);
    background-repeat: no-repeat;
    background-attachment: fixed; //是否滚动,fixed固定
    background-size: cover;      //填充
    background-position: center;
}- background: url:你的背景图片的地址,放置于
Next主题文件下的source/images/background.png - fixed:表示是否随鼠标滚动,选择fixed固定
- size:表示填充
- posi:表示位置
设置背景透明
还是在这个styles.style文件里面,接着上面的内容下面直接复制粘贴:
//文章背板的颜色rgb
.main-inner > .sub-menu, .main-inner > .post-block, .main-inner > .tabs-comment, .main-inner > .comments, .main-inner > .pagination{
    background: #f5f5f56b;      //此处使用十六进制颜色代码,         也可以使用rgba进行调色,
                                //实际效果为白色透明色底板              rgba的第四参数即为透明度
}
body{               //修改主体字体颜色
  color: #000;      //纯黑
}
.posts-expand .post-title-link {    //标题颜色
    color: #000;                //首页文章标题颜色, (默认为灰辨识度不高)
}
.posts-expand .post-meta-container {    //标题下的日期颜色
    color: #880000;             //此处修改为红色,可自行调用rgb调色
}

//侧边框的透明度设置
.sidebar {
  opacity: 0.7;
}

//菜单栏的调色
.header-inner {
  background: rgba(255,255,255,0.7);
}
//搜索框透明
.popup {
  opacity: 0.5;
}

.main-inner {
    background-color: rgba(255, 255, 255, 0);  //主体背景透明
    padding: 0px 40px 40px 40px;  //调整组件位置
}其中所有的内容都有注释,可以自己调节
注意:0为完全透明,1为完全不透明
边框圆角设置
在 style.style同级文件夹下新建:variables.styl,并且在主题配置文件中同样取消custom_file_path的variable的注释,代表启用variable
然后打开这个文件,输入以下内容:
// 圆角设置
$border-radius-inner     = 30px 30px 30px 30px;
$border-radius           = 30px;
其中 数值表示圆角的弧度,可以自己设置
添加代码复制按钮
修改主题配置文件
找到copy_button字段:
# Add copy button on codeblock
copy_button:
  enable: true
  # Show text copy result.
  show_result: default
  # Available values: default | flat | mac
  style:
添加Valine评论
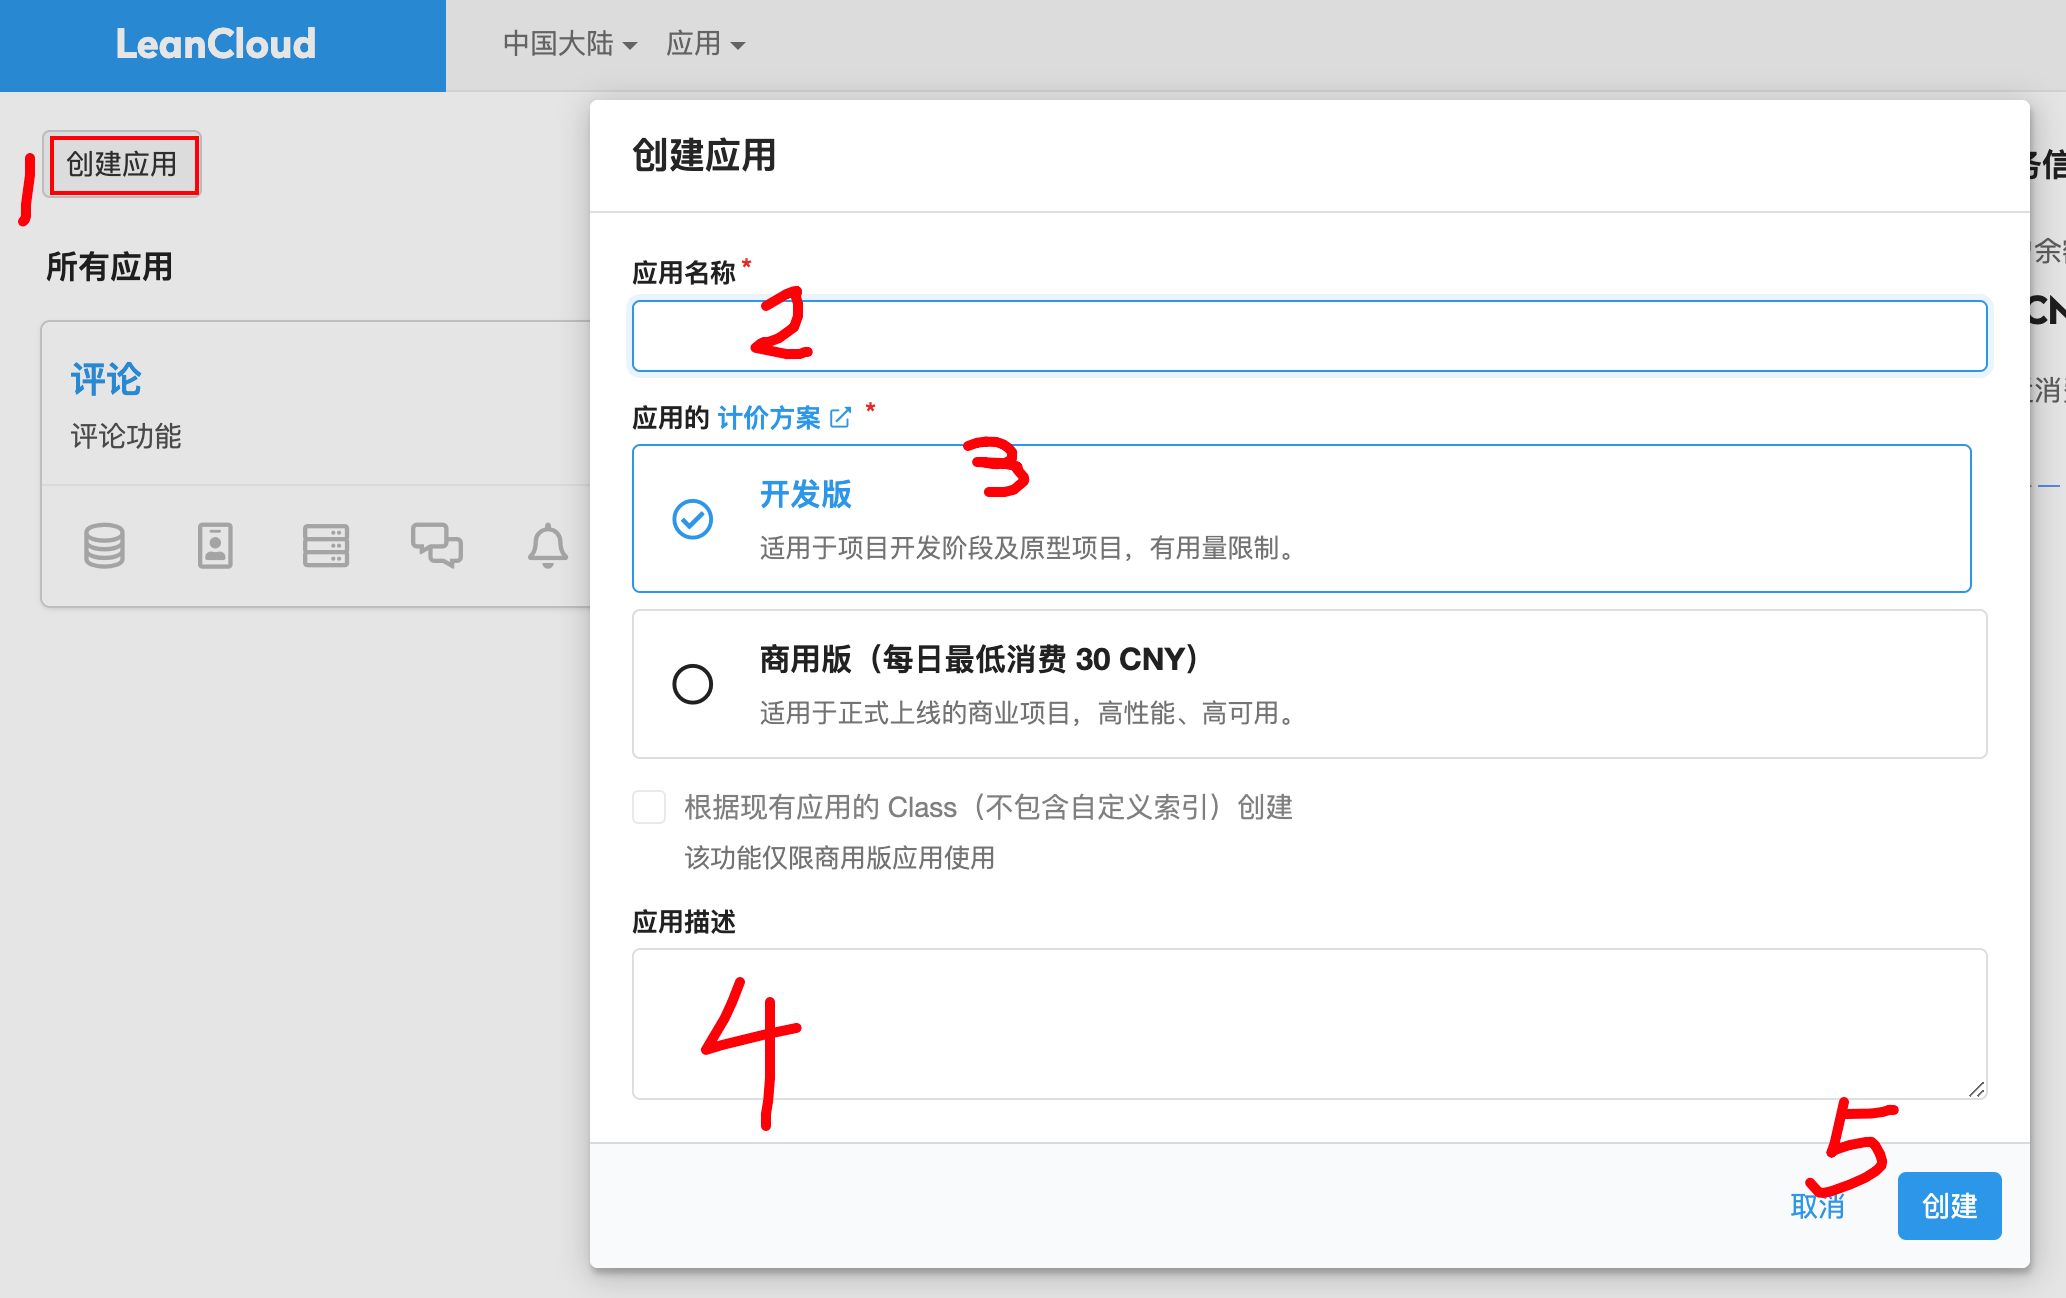
创建开发版应用
找到并记录APPID 和APPkey
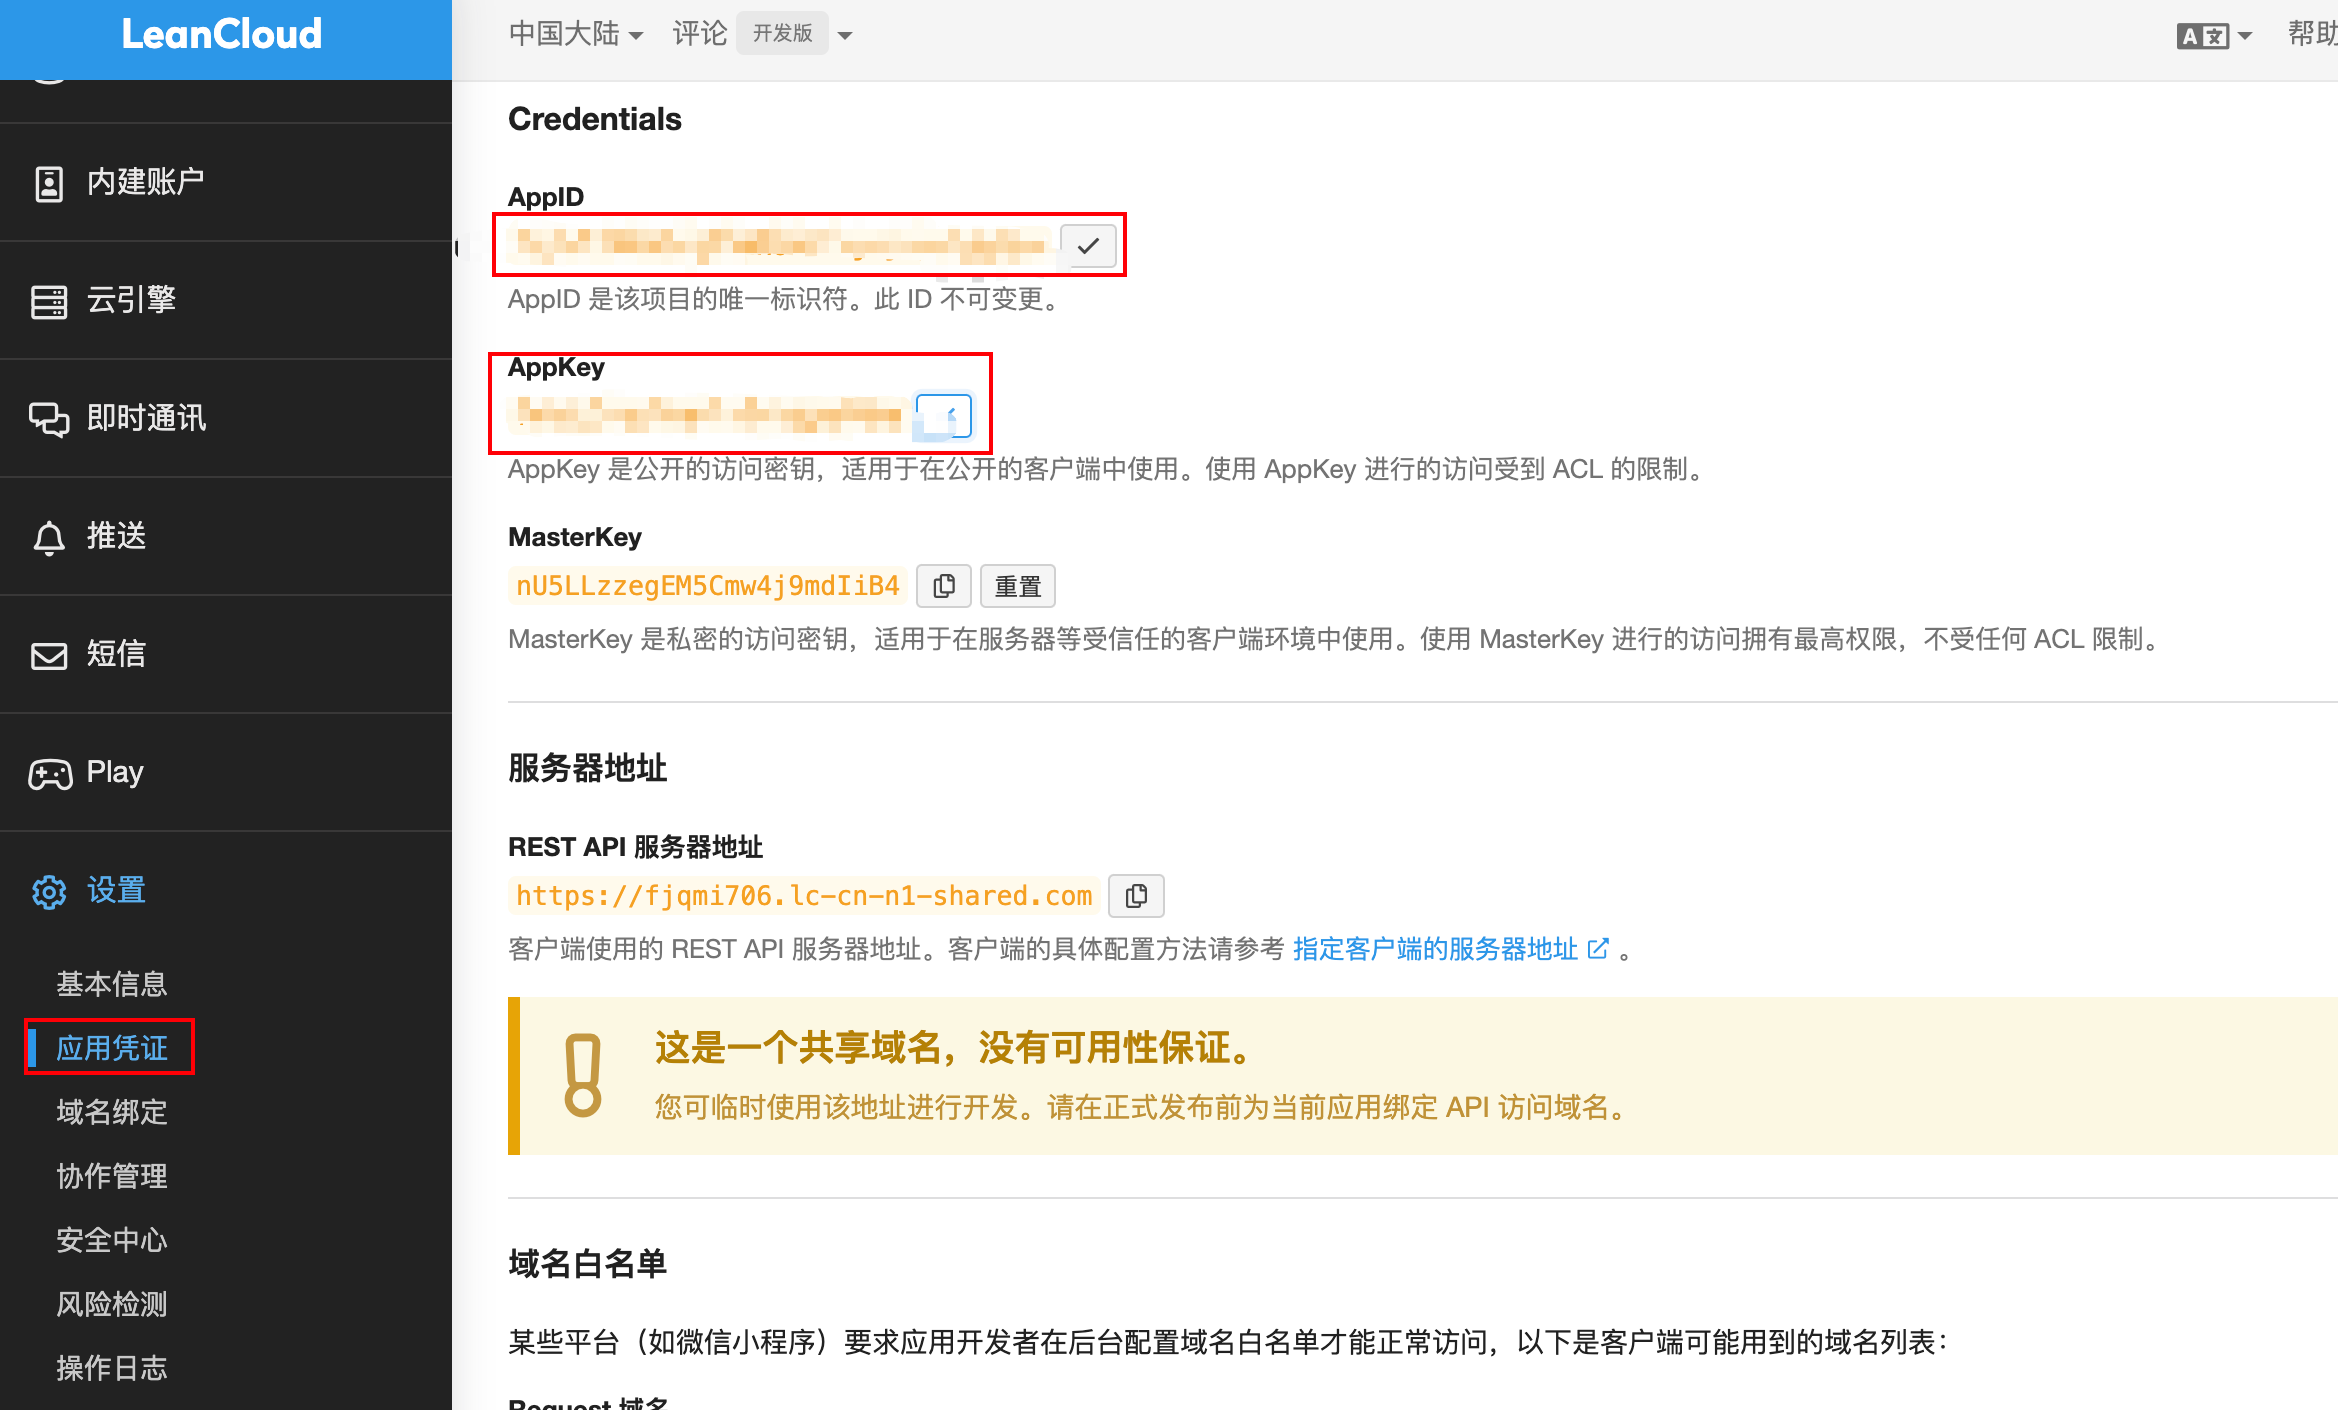
找到next主题中关于valine配置,修改appid和appkey,就可以使用评论功能了!
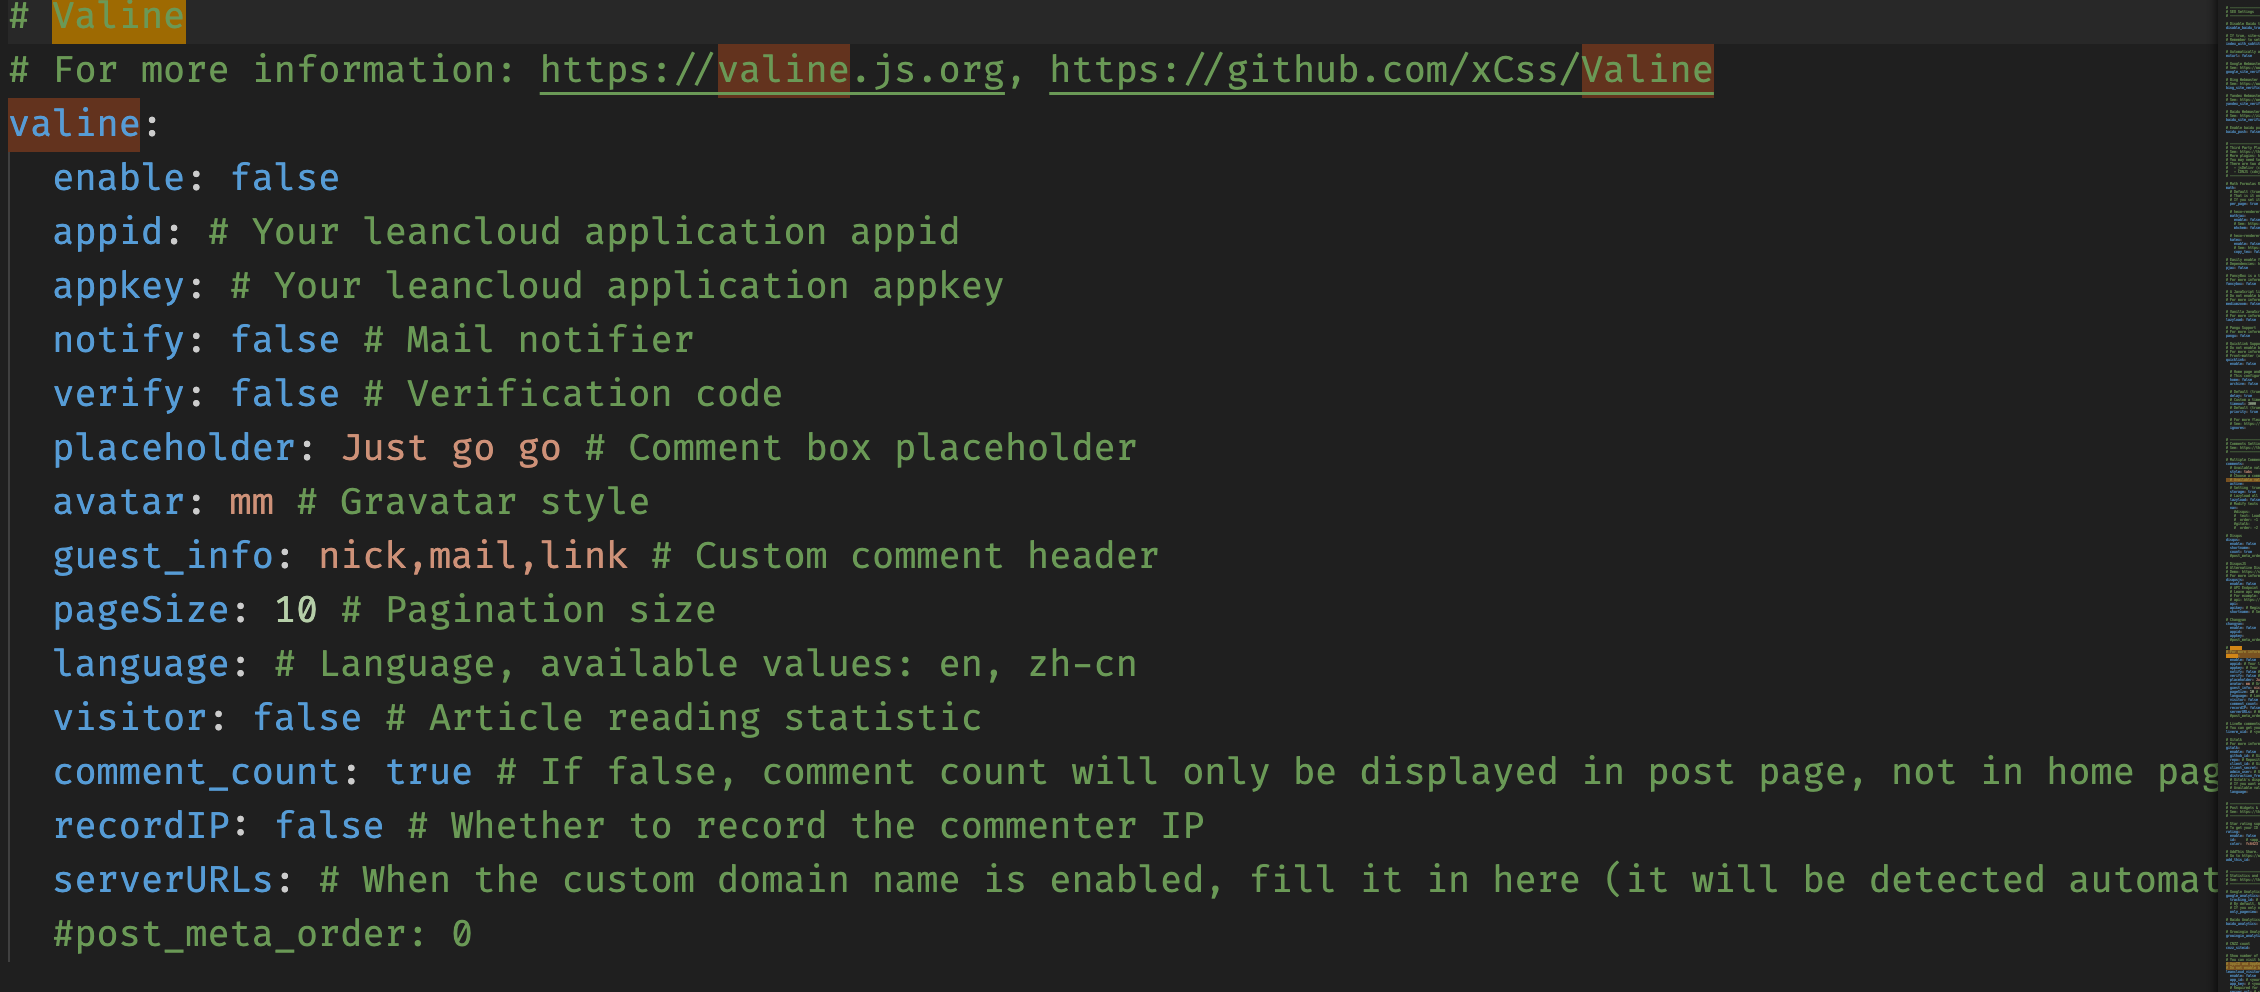
填入appid和appkey,就可以重新部署了!